Angel Drawing Step by Step
An angel is representative of many things. They can be symbols of peace, kindness, prosperity and many other things. Mostly, they have come to represent purity and goodness in general.
They are also a common fixture of many cultures, religions and stories, as well as being heavily associated with holidays like Christmas.
If you love angels or would like to learn how to draw one for a special someone or occasion, then this guide should be perfect for you!
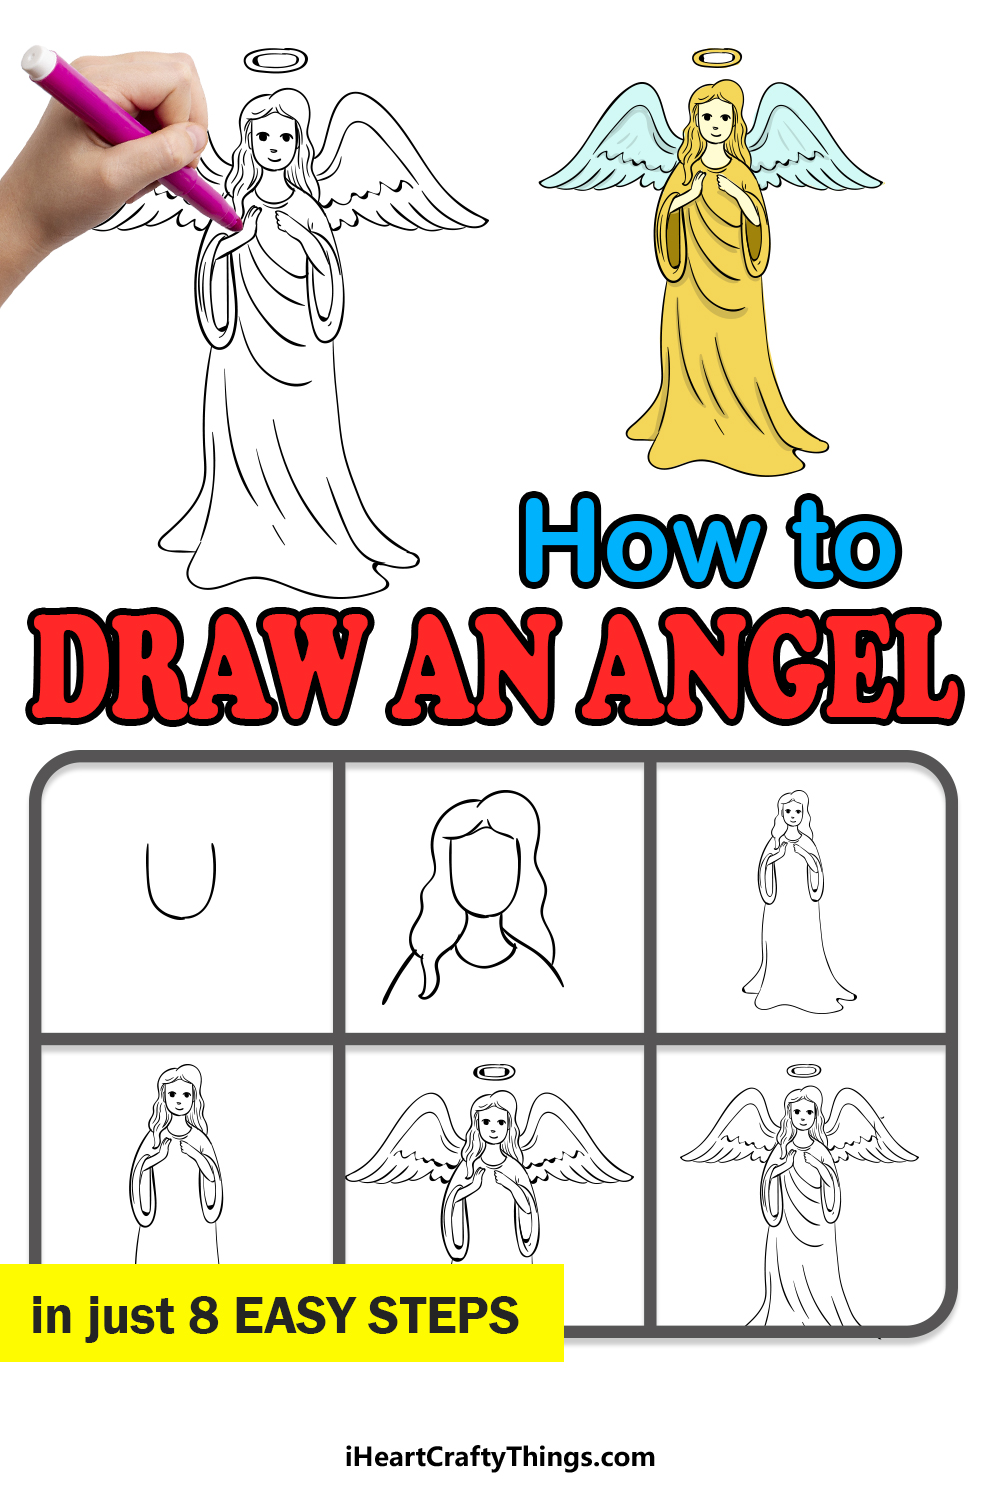
Our step-by-step guide on how to draw an angel will have you designing and drawing your own beautiful angels in no time.
What's in this Blog Post
- How to Draw An Angel – Let's get Started!
- Step 1
- Step 2 – Next, draw the hair and neck
- Step 3 – Now, draw the face and body
- Step 4 – Next, draw some hair details
- Step 5 – Draw some lovely wings
- Step 6 – Next, draw some wing detail and a halo
- Step 7 – Finish off the final details
- Step 8 – Now finish off your angel with some color
- Your Angel Drawing is Complete
How to Draw An Angel – Let's get Started!
Step 1
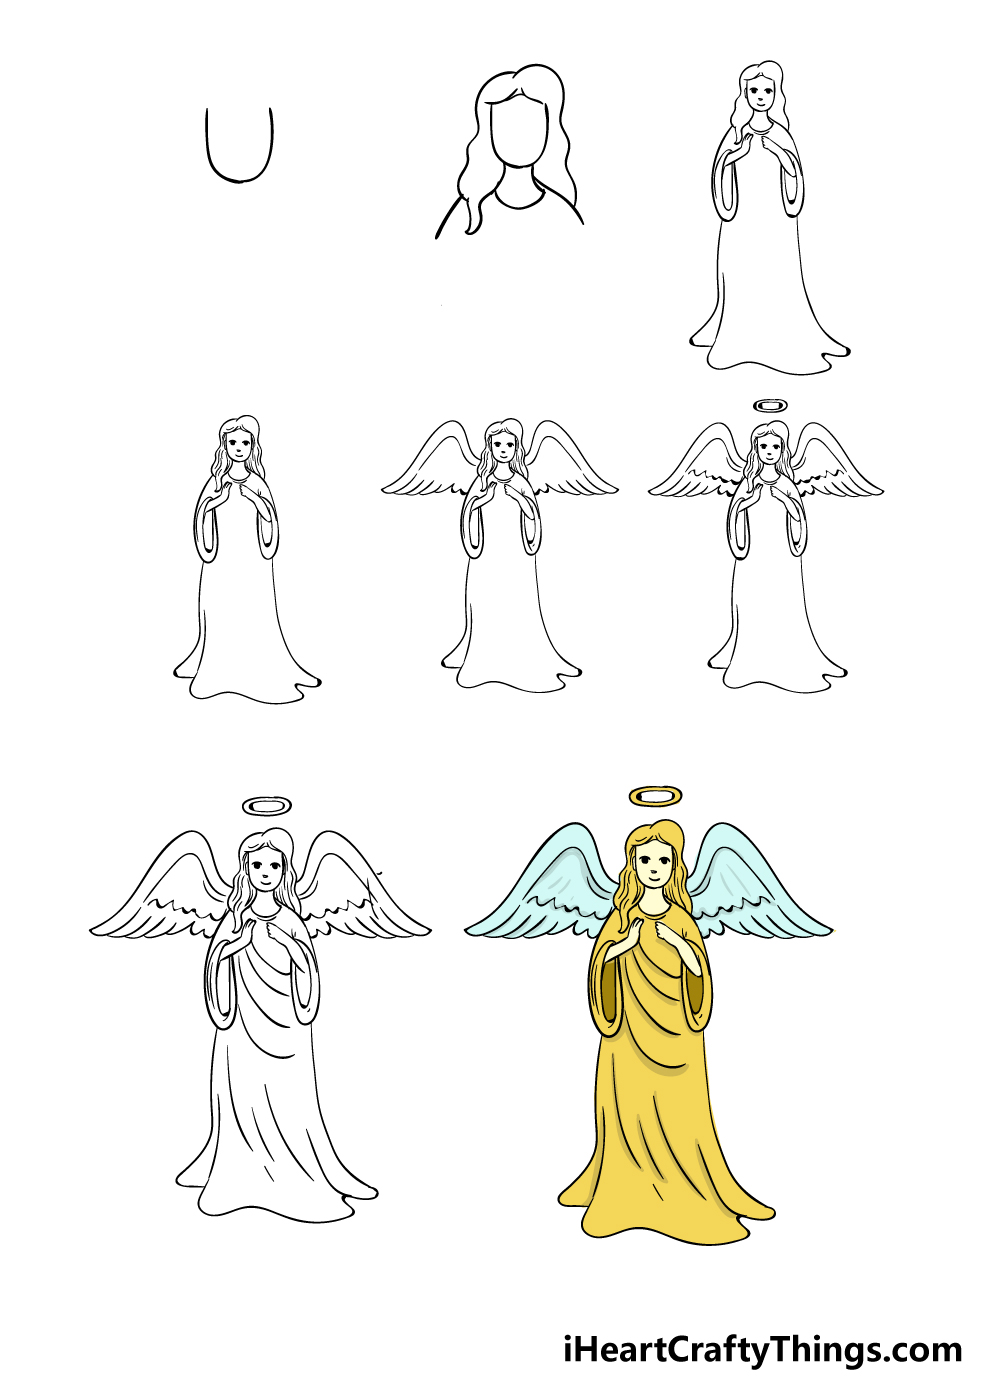
The angel that you will be drawing in this guide on how to draw an angel has a lot of details to it, so we shall take this guide slowly to make sure you don't get stuck.
For this first step, we shall start with the outline for the angel's face. This will be made from a simple, curved line like the one that we have in our reference image.
We will be building on to this line in the next few steps, so let's move on!
Step 2 – Next, draw the hair and neck
Using the curved face line, you can start to add some hair to your angel drawing. The outline for the hair is quite simple, but we will add more detail to it later.
Don't be afraid to carefully refer to the reference image in order to get the hair to look like our example!
Once you're happy with how it looks, then you can draw some curved lines coming down from the face to form the neck of your angel.
Finally, draw some more lines coming off the neck for the shoulders, and then add one more line underneath the neck for the neckline of her gown.
Step 3 – Now, draw the face and body
We will be adding a lot in this step of our guide on how to draw an angel, so we shall take it slowly!
Firstly, you can finish off the face of your angel, and as you can see in our reference image we chose a simple yet effective design for the face.
With some fairly simple dots and lines, you can create a gentle, smiling face like our one.
You might want to use a pencil for the arms of your angel drawing before you use your pen, as it can be a bit tricky.
First, draw some long oval shapes for the sleeves of the gown. Then, draw another oval within that one before drawing the arms coming out from that one.
It may sound complicated, but if you use the reference image then it's easier than you think!
Finally, draw the rest of the gown coming down from the sleeves and make it so that it is trailing on the floor a bit.
Step 4 – Next, draw some hair details
There was a lot of drawing in the previous step, so we'll keep this one simple!
Simply add some lines into the hair outline in order to create some lovely hair detail for your angel drawing.
Step 5 – Draw some lovely wings
Your angel needs some wings, so let's add some in this step of our guide on how to draw an angel!
The top of the wings will start from the hair of the angel, have some jagged lines along the bottom to look like feathers and then end on the shoulders.
Once you have the wings, we shall add detail to them in the next step.
Step 6 – Next, draw some wing detail and a halo
You can finish off the wings for this part of our guide on how to draw an angel! To add some lovely details to them, add some curved lines in a row above the tips of the wings to make them look even more feathery.
Then, add some lines like the ones in our reference image that run along the edge of the wings. This will help create some structure for them.
Finally, give your angel drawing a beautiful halo with two ovals, one inside the other, above her head.
Step 7 – Finish off the final details
Your angel drawing is looking amazing! Let's just add a few more details before the final step.
Simply add some long, curved lines to the gown to create the look of flowing fabric. It's a simple detail that makes all the difference!
Step 8 – Now finish off your angel with some color
This is the most fun of all the steps in this guide on how to draw an angel! You get to color in your amazing creation now, and this is a step where you can really show off your creativity.
Angels traditionally feature a lot of yellow, gold and white, so while you could stick to these colors, you could also use any other colors that you love!
If I were coloring this in, I would use watercolor paints for a soft, glowing look, and then finish off the halo and elements of the gown with some gold glitter paint.
Which colors and mediums will you use for your angel? We will look forward to seeing how you finish this drawing off!
Your Angel Drawing is Complete
We really hope that you had a lot of fun working through this guide on how to draw an angel!
We wanted to show you that even though a drawing may have some more intricate detailing to it, you can still do it if you take it step by step and try your best.
Now you can show us how you will finish off this wonderful drawing!
Whether you draw some extra details, create a background or work in some pretty crafts, we know that you will do an amazing job putting your own spin on this drawing.
We have lots of incredible drawing guides just like this one on our website for you to enjoy, so please remember to check in often!
We will be uploading more very frequently, so come join in the fun!
Once you have finished your amazing angel drawing, we hope that you will share it on our Facebook and Pinterest pages for us to enjoy! We can't wait to see your amazingly creative artwork.
fergusonlythe1950.blogspot.com
Source: https://iheartcraftythings.com/angel-drawing.html
0 Response to "Angel Drawing Step by Step"
Post a Comment